Red Velvet Cookies
This post may contain affiliate links. Read our disclosure policy.
Red Velvet Cookies – These are deliciously soft and chewy, gorgeously red along with a pretty white chocolate chip contrast, and they’re perfectly sweet with hints of vanilla and cocoa flavor. It’s a tempting treat that people of all ages will enjoy!
Red Velvet White Chocolate Chip Cookies
Red velvet cookies would have to be one of the ultimate Christmas or Valentines Day cookies with their pretty and festive red color.
These are an easy to make cookie that uses basic ingredients and they’re sure to satisfy those red velvet cravings!
These cookies are a combination of two of the best desserts – red velvet cake and chocolate chip cookies.
Really you just can’t go wrong with these cookies! You just get simple classic flavors and a fun new take on cookies.
It’s a simple baking project that’s perfect for the weekend, just don’t wear your best attire with all that red. Also plan some time since cookie dough needs to chill (otherwise cookies will spread too much).
Watch the Video!
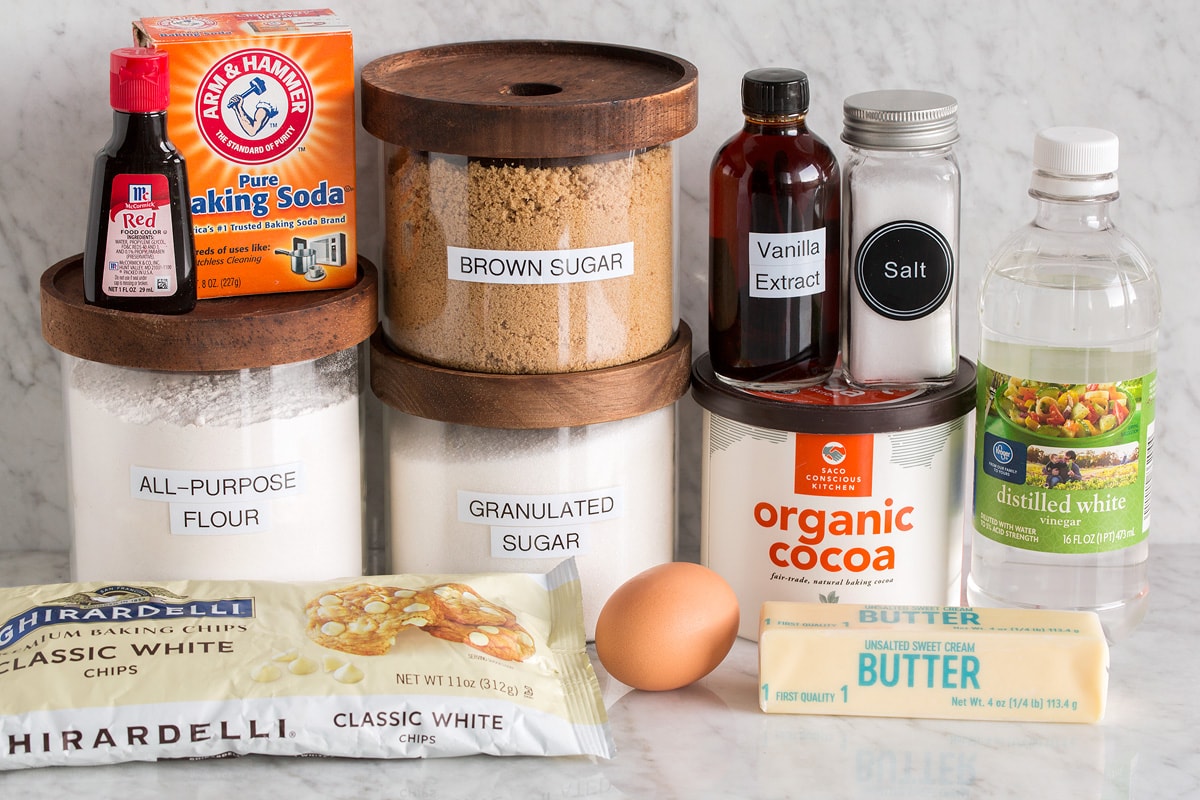
Red Velvet Cookies Ingredients
- All-purpose flour: Bleached or unbleached flour works here. Bleached spreads just a little less and produces softer cookies while unbleached flour makes slightly chewier cookies.
- Cocoa powder: Don’t use dutch process cocoa powder, it’s too dark here.
- Baking soda: If you want cookies a little puffier include 1/4 tsp baking powder along with the baking soda.
- Salt: Just use table salt.
- Unsalted butter: If you only have salted butter on hand you can use that here. Just add 1/8 tsp salt to the recipe.
- Granulated sugar and brown sugar: The combo makes the cookies perfectly sweet and the brown sugar helps make the cookies softer.
- Egg: This helps bind the ingredients and also makes for a softer cookie.
- Red food coloring: I have made these with both gel and liquid food coloring. Gel seems to work just a little better since it’s not as liquidy but it is harder to find at most grocery stores so I’ve included options for both. You can try beet powder or a natural gel color but keep in mind the color won’t be as vibrant.
- Vanilla extract: Another option here is to use vanilla bean paste.
- Vinegar: Just plain white vinegar is used here (similar to classic red velvet cake) but I’ve also used lemon juice and it works well too. It just boosts flavor a little.
- White chocolate chips: I like the pretty contrast of the white chocolate chips but semi-sweet or even milk chocolate chips will work well too for richer chocolate flavor.
How to Make Red Velvet Cookies
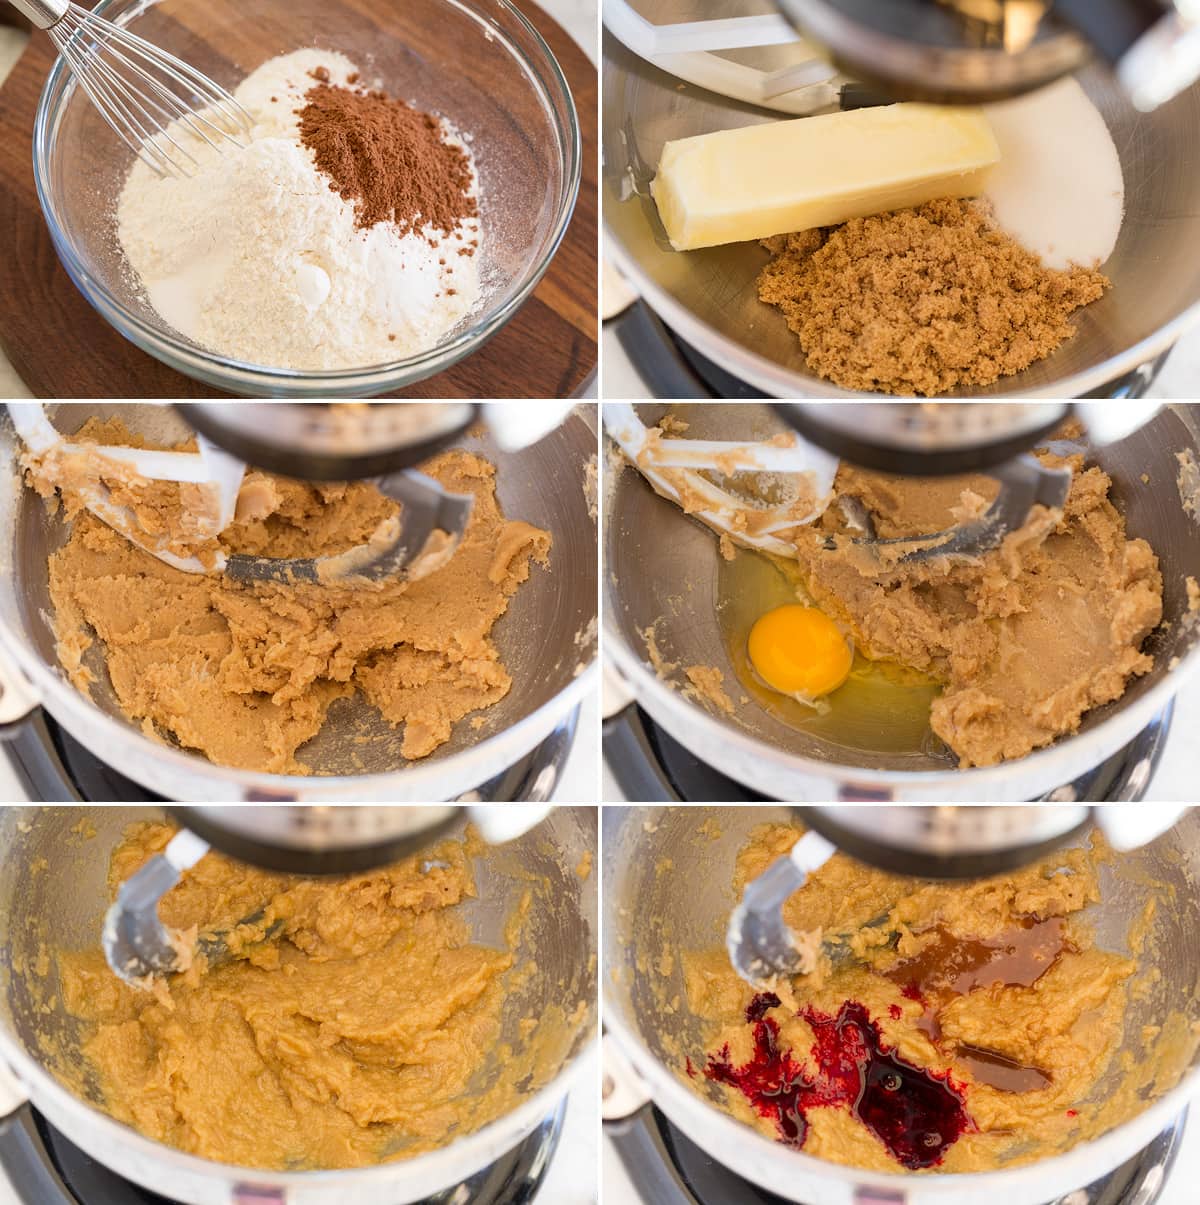
- In a mixing bowl whisk together flour, cocoa powder, baking soda and salt, set aside.
- In the bowl of an electric stand mixer fitted with paddle attachment cream together butter, granulated sugar and brown sugar until combined.
- Mix in egg. Add in red food coloring, vanilla and vinegar.
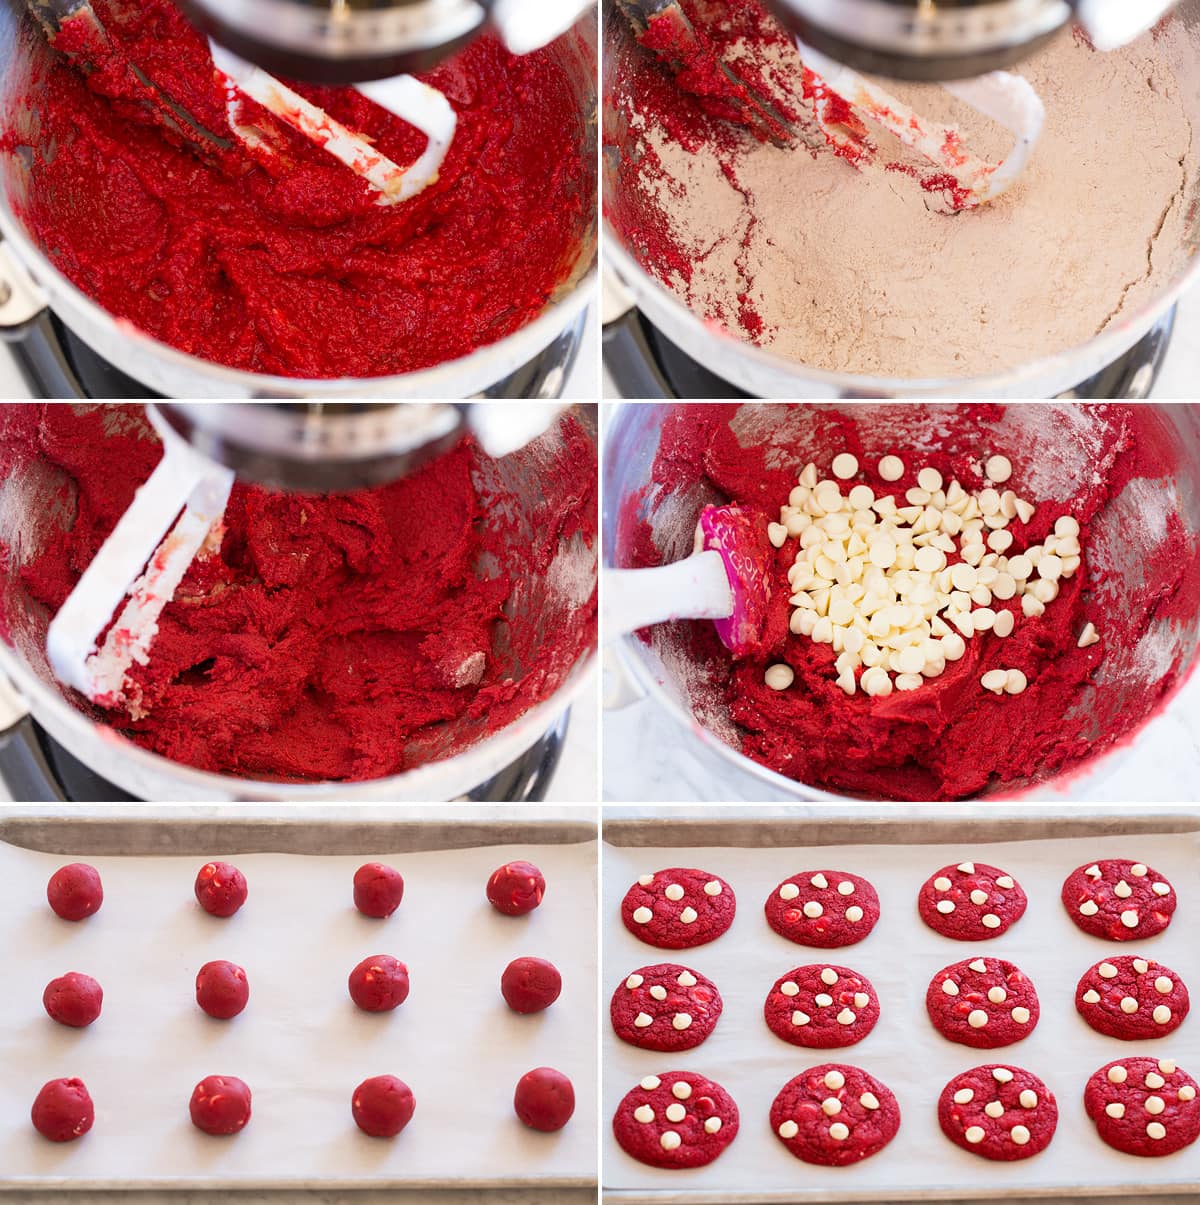
- Add flour mixture and mix just until combined.
- Mix in 3/4 cup white or semi-sweet chocolate chips (set aside remaining 1/3 cup to use after baking).
- Cover bowl and chill dough 1 – 2 hours until dough is nearly firm. Near the end of chilling preheat oven to 350 degrees.
- Scoop dough out and shape into balls about 1 1/2 Tbsp each (or 28g). Transfer to parchment paper lined baking sheet spacing 2-inches apart.
- Bake one sheet at a time (keep remaining dough chilled and repeat process), until cookies appear set on the edges but slightly under-baked in the center, about 10 – 11 minutes.
- Remove cookies from oven and gently press some of the remaining white chocolate chips into tops.
- Let cool on baking sheet 5 minutes, then transfer to a wire rack to cool.
Storage and Shelf Life
- Store cookies in an airtight container (I even add them to the storage container before they are completely cool to trap in some of the steam and moisture.
- To help keep cookies soft add a few slices of bread to the storage container or lay flour tortillas over tops.
- These cookies are best enjoyed within 2 days of preparing.
- I don’t recommend freezing as cookies will likely become dry.
Variations
- Skip the white chocolate chips being mixed in and rather dip the one half of cookies in melted white chocolate or drizzle it over the top.
- Add 1 tsp lemon zest for a light zip.
- Use milk chocolate or dark chocolate chips.
- Replace 1 Tbsp of the flour with an additional 3 tsp cocoa powder for a little more chocolate background flavor. Just keep in mind cookies won’t be quite as red.
- Omit white chocolate chips and instead finish cookies with a cream cheese frosting.
More Tempting Red Velvet Desserts to Try
Follow Cooking Classy
Red Velvet White Chocolate Chip Cookies
Ingredients
- 1 1/3 cups (189g) all-purpose flour (scoop and level to measure)
- 4 tsp (6g) cocoa powder*
- 1/2 tsp baking soda
- 1/4 tsp (heaping) salt
- 1/2 cup unsalted butter , softened
- 1/2 cup (100g) granulated sugar
- 1/4 cup (55g) packed light brown sugar
- 1 large egg
- 2 tsp liquid red food coloring, or 1 1/2 tsp gel red food coloring
- 1 1/2 tsp vanilla extract
- 1 tsp white vinegar or lemon juice
- 3/4 cup + 1/3 cup white chocolate chips or semi-sweet chocolate chips, divided
Instructions
- In a mixing bowl whisk together flour, cocoa powder, baking soda and salt, set aside.
- In the bowl of an electric stand mixer fitted with paddle attachment cream together butter, granulated sugar and brown sugar until combined.
- Mix in egg. Add in red food coloring, vanilla and vinegar.
- Add flour mixture and mix just until combined. Mix in 3/4 cup white or semi-sweet chocolate chips (set aside remaining 1/3 cup to use after baking).
- Cover bowl and chill dough 1 - 2 hours until dough is nearly firm. Preheat oven to 350 degrees near the end of dough chilling.
- Scoop dough out and shape into balls about 1 1/2 Tbsp each (or 28g). Transfer to parchment paper lined baking sheet spacing 2-inches apart.
- Bake one sheet at a time (keep remaining dough chilled and repeat process), until cookies appear set on the edges but slightly under-baked in the center, about 10 - 11 minutes.
- Remove cookies from oven and gently press some of the remaining white chocolate chips into tops.
- Let cool on baking sheet 5 minutes, then transfer to a wire rack to cool.
- Store cookies in an airtight container. Keep a few bread slices or large flour tortillas in container with cookies to keep them soft.
Notes
- *Sift cocoa powder into flour mixture if it's clumpy.
- Recipe has been updated December 2020.
