Minnie and Mickey Mouse Oreo Cookie Pops
This post may contain affiliate links. Read our disclosure policy.

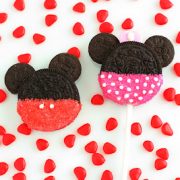
Fun and festive Minnie & Mickey Oreo Cookie Pops are as delicious as they are easy. Kids love these for Valentine’s Day, or a cartoon-themed birthday party. Simply dip chocolatey Oreos in colored candy melts, decorate with dots and sprinkles, then add the signature ears!
I love the color of these for Valentine’s. These are an easy, delicious treat to make for your kids for the upcoming Valentine’s Day. These would also be great for Birthday parties, just double/triple the recipe as needed. You may think that they are only a good treat for kids, but I couldn’t stop eating them.
They taste like cookies and cream, since almond bark is an imitation of white chocolate. Just be sure to have a few spare Double Stuf Oreos because it’s likely a few will break as you prepare them (they are pretty fragile and a few come cracked in the package, unfortunately). With that said, I would recommend checking for cracks and choose 12 good ones to start with.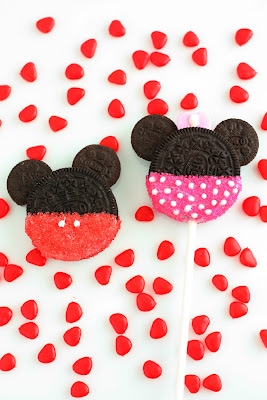
Tips for Making Minnie & Mickey Oreo Cookie Pops
- Dip the lollipop sticks in almond bark before inserting into the Oreo creme for more sticking power
- Do the same with the mini Oreos as you stick them on for the ears
- Use toothpicks or unused lollipop sticks to create the polka dots, or put some candy melt in a piping bag
- Experiment with sprinkles and other candies (green and red can make these Christmas-themed!)
- Use Golden Oreos to try Donald and Daisy Oreo Cookie Pops
- Tie a colorful ribbon around the stick, or tie several together for a delicious bouquet
- Seal in a cellophane bag to keep for up to a week—perfect for party preparations in advance


Try these Minnie & Mickey Oreo Cookie Pops for Valentine’s Day, or a Disney-themed birthday party, but don’t stop there! Experiment with these easy treats for other holidays like Christmas, Halloween, and even the Fourth of July! You’ll wow everyone, but you won’t even have to turn on your oven.
Follow Cooking Classy
Minnie and Mickey Mouse Oreo Cookie Pops
Ingredients
- 12 Double Stuf Oreos , plus a few extra in case they break
- 12 mini Oreos
- 6 oz . vanilla almond bark (4 squares)
- Pink and red sugar crystal sprinkles
- Pink mini conversation hearts , for Minnie bows (thinnest you can find, I used Ferrara Pan brand)
- 12 8 inch sucker sticks (optional)
Instructions
For Minnie Mouse
- Using a knife, split mini oreos and remove cream center so you know have 24 mini Oreo pieces. Pour pink sprinkles into a small bowl. Melt almond bark in a microwave safe bowl in 20 second intervals, stirring after each interval until melted and smooth.
- Dip the bottom tip of a conversation heart in the almond bark, scrapping off excess then insert into top center of the oreo with the "converstion" facing the backside (you may have to carefully open the oreo a bit to get it to fit inside), then take 2 of the mini oreos and dip the bottom tip in the melted almond bark then insert each one next to the conversation heart.
- Dip bottom half of the Double Stuf Oreo into the melted almond bark, allow excess to drip off then scrape excess from the back and bottom edge. Dip almond bark coated cookie into pink sprinkles and coat evenly. If making pops, dip about 1" of the sucker stick into almond bark then scrap of excess and insert stick through center of oreo before coating hardens.
- Lay cookie on wax paper and allow coating to harden. Spoon some of the melted almond bark into a small ziploc bag, snip a tiny tip off of one corner of the ziploc bag and pipe polka dots over pink sprinkles and one oval in the center of the conversation heart bow. Allow to harden.
For Mickey Mouse
- Follow directions listed above, omitting conversation heart and using red sprinkles in place of pink. Pipe two small buttons with melted almond bark rather than polka dots.